Showing posts with label recipes. Show all posts

Tuesday, September 22, 2009

Spaghetti


As I am sure Ihave mentioned before, probably several times, I love to cook especially when the weather is cooler.  Yesterday being the first day of fall, came in just as it should.  It started off a wonderful summer day yet by mid afternoon a cold front had blown in and the weather shifted much cooler.  A stiff north breeze made it seem all that much colder.  Of course this immediately put me into the mood, so for dinner I prepared one of Vince's favorites Spaghetti. 

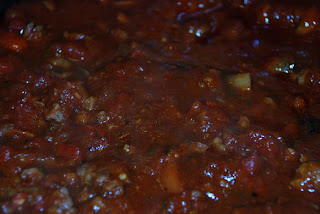
I love the aromas this meal puts through the air... Garlic, Oregano, Rosemary and they are just a few.  Of course my sauce starts first, as I love to let it simmer for as long as possible.  Start to brown a pound of suasage.  I know many people prefere beef, yet to me sausage gives it a bit more of a spicy taste.  As that is browning, I add chopped onions, any peppers I may have (green, red, yellow whatever), and a few cloves of garlic.  Seasonings of salt,

pepper, oregano, thyme,  and parsley are also added while the meat is browning.  I then add about 2 cups of sliced fresh mushrooms. Add a small splash of olive oil, about a Tablespoon or so.  You may not necessarily need it but it gives a wonderful hint of taste.   When the meat has cooked thoroughly, I then add my sauce.  I am all about easy so... I use a jar of good sphaghetti sauce, 1 can of diced tomatoes, and a small can of tomato paste.  On the top I place a fresh sprig of Rosemary.  It is wonderful to have my own herbs growing outdoors where I can just go and pick them when I wish.  The difference of fresh is wonderful.  Cover and let simmer on low while you prepare the rest of the meal and enjoy the wonderful aroma.

Next of course are the noodles.  While boiling your water, add salt, pepper, 2-3 crushed

garlic, olive oil, oregano, & parsley.  Place your noodles in when the water comes to a good boil.  It seems everyone likes their noodles a different consistency... Yet I remember an old woman once told me the way to check for doneness is to take a couple noodles and throw them at the wall.. If they stick they are done.. Now I dont necessarily do that yet I found her method quite funny.  Strain the noodles in a colandar.  Much of the herbs added eariler will cling to them giving that much more flavor and appearance to the finished product.  The olive oil also helps to keep them from sticking.

Of course no spaghetti dinner would be complete without garlic toast.  Slice up a small loaf

of french bread and place on a cookie sheet.  In a small bowl combine:  olive oil, pepper, sesame seeds, 1 Tablespoon butter, and 1-2 crushed garlic cloves.   Microwave this briefly just to melt the butter .  Spread on both sides of cut bread and broil in oven until lightly brown.  Turn as needed.  The rest... well that is simple... sit down and enjoy.  Needless to say it was an enjoyable dinner and just the right meal to start off our Fall season. 

The weather this morning is cloudy and a cool 56... I may just have to bake a little.. I did promise my son a goodie box in the mail.... Enjoy your day.

Wednesday, September 16, 2009

Peanut Butter Cookies


As the cooler weather continues and the sun decides to stay hidden by the clouds, the urge to bake is becoming stronger and stronger... I have tried somewhat to keep myself from its calling yet I think today I will give in. I have decided that my baking season has begun. Even if I have to give all my creations away. The urge is too strong.
Thus, today I decided to start small and make some cookies.. Usually Chocolate chip are the usual standby.. I love them soft and gooey, yet Vincent is not fond of them. So I will whip up a batch of his favotite, Peanut Butter. They also lend themselves nicely to the coolness and feeling of the coming Autumn.

This recipe is simple and usually one that is a favorite with my grandkids as they love to make the criss cross with the fork. Enjoy

1 cup shortning
1 cup peanut butter
1 cup granulated sugar
1 cup packed brown sugar
3 eggs
3 cups flour
2 tsp baking soda
1/4 tsp salt

In a mixing bowl, cream shortning, peanut butter, and sugars.  Add eggs one at a time, beating well after each addition.  Sift together flour, baking soda, and salt and add to creamed mixture.  If you do not have a sifter, an easy way is to whisk the ingrediants together in a separate bowl, this works just as well. 

Roll mixture into small balls, aproximately 1 1/2".  Place on ungreased baking sheet 3" apart.  Flatten with a sugared fork, making the well known criss cross pattern. 
Bake at 375 degrees for 7 to 12 minutes.  Let cool slightly and remove from baking sheet.  Sit back and enjoy.

Extra note:  Recently per the Domestic Witch blog ( http://domesticwitch.blogspot.com/ ) she had a delightful recipe for lavendar sugar, which I intend to use.  I think that this would be perfect to use as a dusting on these cookies or possibly the sugar to dip the fork in before making the criss cross. 

Wednesday, August 26, 2009

Peanut Butter Squares

It was not that long ago when our grandchildren would stay with us on a regular basis. We definitely had our routine down. When evening rolled around and it was time for her brother to go to bed, Kylie was ready for the ritual that her and Vince had created. I would tend to her little brother, seeing that he was bathed and dressed for bed. We usually would read a story and do our normal chit chat. Needless to say this took a while before I once more returned to the others. They likewise would begin their nightly tradition of going to the freezer and eating their frozen Reese Cups. It was one of their favorite things to do.

I was given this recipe a few years back by a young girl, whom I worked with. Courtney did not necessarily look like the cooking type yet she made some of the best things to eat. I usually only make these at Christmas time, yet they could be easily be enjoyed year around. They taste very similar to a Reese Cup.

Bottom
2 sticks butter
2 cups smooth Peanut Butter
1 lb. box powdered sugar
1 1/2 cup crushed graham crackers

Melt 2 sticks of butter and 2 cups of smooth Peanut Butter. Mix with 1lb. box of powdered sugar, and 1 1/2 cup crushed graham crackers. Spread in greased 9x13 pan. Pat down until smooth.

Topping
1 stick butter
12 oz. chocolate chips

Melt 1 stick butter with 12 oz chocolate chips. Pour over top of Peanut Butter Mixture. Refrigerate approximately 2 hours or until firm. Cut into bite size pieces and enjoy.

Tuesday, August 18, 2009

A Simple Yummy Snack


Recently while talking to my youngest son, he commented on how much he enjoyed the recipes each week. He also added that he had not tried any of them, he just enjoyed reading them. This statement got me to wondering if possibly the difficulty was too much for him.

This week I have chosen something that is by far one of my favorite foods to eat through out the summer. It is good for a snack, a meal whatever. The best thing about this food is that it is so low in calories so really you don't have to feel guilty about eating it. Even having seconds can not hurt you. Best of all, it is as simple as simple gets

I am talking about a sliced tomato sandwich. I learned this recipe from my mom, being the proper German she is. Take a slice of rye bread, I prefer the Jewish rye as it is lighter than pumpernickel and not as many seeds. Russian Rye is also good. Lightly butter the bread. Personally real butter is my preference. Lightly pepper. Thinly slice a tomato as to cover the bread then lightly once again salt and pepper the tomato.

That is all there is too it. Simple.... fast... and totally delicious. Roughly 80-100 calories depending on the type of bread you use. One note: If you feel you do not like rye bread and attempt to use wheat or white, be forewarned that you will not achieve the same taste. The rye bread is a large part of the wonderful taste of this sandwich and its denser texture lends itself nicely.


Enjoy....
Janie

Wednesday, August 12, 2009

Sour Dough Bread Starter


Although it is only early August, we have been blessed with some wonderfully cooler days reminiscent of early fall. It never fails when the cooler days begin, my love for cooking, especially baking rises to the top of my priorities. With the kids not as close as before I have to watch the things that I may bake as an over abundance means waste or the fact that Vincent and I may have to eat it.

Breads are a good alternative to cakes, pies, and cookies,especially sour dough bread. The starter is kept and fed over a weeks period just in time to make a new loaf when the other has been eaten. I have also kept it in the fridge a bit longer than normal if a new loaf is not needed and it has survived just fine. This lends itself to a slightly sweet bread that I have toyed around with and made cinnamon bread and others. Enjoy

Starter

3/4 cup sugar
3 Tablespoons of instant potato flakes
1 cup warm water

Mix together in the morning and let stand out of the refrigerator all day. You may make bread the first day, however I have found it is best when you let it stand a bit longer. At the end of the day place the starter in the refrigerator in a quart jar with a loose lid. Saran wrap placed loosely on top works well.

Let the starter sit for approximately 3 to 5 days. Take the jar out in the morning. feed with the above ingredients and let stand on counter for the day. In the evening or late afternoon you will be ready to prepare your bread dough.

Take one cup of starter out of the feeder jar and place the jar back into the refrigerator until you make bread again and start the process over.

Bread Recipe

1 cup of Sour Dough Starter
2 Tablespoons Sugar
1/4 cup oil
1 teaspoon salt
1 1/2 cup warm water
6 cups bread flour

Mix all the ingredients together and place in large greased pan. Cover lightly with plastic wrap . Leave on counter overnight to rise.

Next morning, punch down and divide into 3 parts (possibly 2 depending on the size of your loaf pans). Knead each part on a floured surface and put into greased loaf pan. Brush the tops with oil. Cover lightly and let stand until doubled in size. This can be anywhere from 3-6 hours.

Bake 30-35 minutes at 350 degrees or until golden. Brush with butter when removed from oven.

The starter gets larger each time you feed it. You may use an extra cup occasionally to make extra bread, or give the starter away to a friend.

Wednesday, August 5, 2009

Banana Nut Bread

One of the things I miss most about my old job are the friends that were made. Some of them I still keep in contact with and visit with quite often. Yet there are some that I have not. One inparticular was a woman named Mireida. She was of Dutch descent and came from Aruba. She was a lovely woman with truly compassionate personality. Often she would bring me goodies as a gesture of our friendship. One of my favorites was her Banana Nut Bread. It was so moist and so wonderful with a cup of coffee. It took some coaxing yet eventually I was able to get the recipe from her. I am not usually a big banana bread lover, yet this recipe changed my mind. Enjoy.

1/2 cup butter, softened
1 cup sugar
2 eggs
2 cups mashed ripe bananas
2 cups unbleached flour
1 teaspoon baking powder
1 teaspoon baking soda
1/2 teaspoon salt
1/2 cup chopped pecans
1/2 cup raisens
* Cream butter; gradually add sugar, beating well. Add eggs, one at a time. Beating well after each addition. Add bananas and mix until smooth.
* Combine flour, baking powder, baking soda, and salt. Add to creamed mixture, stirring just enough to moisten. Fold in chopped pecans and raisens.
* Pour batter into greased and floured 9x5x3 loaf pan. Bake at 350 for 1 hour and 10 minutes. Cool in pan for 10 minutes .

Wednesday, July 29, 2009

Summer Salsa


This is a perfect salsa to make in the summer to just keep on hand to eat at anytime. It is fast and easy to make and is even good for you.


2 cans of black beans
2 cans Rotel tomatoes (Mild or Hot depending on your taste)
2 cans Corn
1 bunch of fresh green onions
1 red onion chopped
1 ½ tsp Cayenne Pepper
1 bottle of Zesty Italian Dressing
1 finely chopped JalapeƱo (Optional)
1 small green and red pepper chopped


Put all the ingredients into a large bowl, chopping up the vegetables as needed. Cover with Italian dressing and stir to coat entirely. Cover with lid and place in refrigerator overnight. Before serving drain in colander to remove excess liquid and place in serving dish. Great with tortilla chips or just by itself. This can be altered to fit your taste in regards to spiciness. I have found also that squeezing a lime over the top adds a nice little kick. Enjoy.

Friday, July 24, 2009

Fairy Honey Cakes

Cooking has always been dear to my heart. It seems that when I prepare something for others to eat, it is like giving them a little piece of me. I have always enjoyed eating, especially something that is delicious, and therefore I strive to give my company that same experience when they partake of my creations. They are not grand or exotic, mainly just home-made and tasty. Simple home cook food is what I am most fond of. I am blessed to have local growers who supply me with a variety of garden vegetables and fruits. Farm fresh eggs are also available. I like the natural taste of putting it all together yourself. Yes I know it takes a bit longer to prepare but it tastes so good…

Beginning today and continuing each Wednesday hereafter, a new and creative recipe and/or kitchen tip will be introduced. And requests, feel free to ask. I may not know yet I am willing to try and find out. Today’s recipe is my Fairy Honey Cakes. This is a recipe I only recently found, yet loved it the first time I made them. They are a spice cupcake that is simply wonderful with a cup of hot tea or coffee. The honey lends itself to create a sweet crunchy top that is simply to die for. I usually make these in cooler weather, yet recently I found some of the most delicious local honey that I just had to make a batch. Enjoy.

1 ½ cup honey (fresh local honey is best)
1 teaspoon ground cinnamon
½ cup brown sugar packed
½ cup butter (real butter is best)
1 egg
2 cups flour (I prefer the unbleached)
½ teaspoon baking soda
Approximately 2 Tablespoons milk


Sift flour, cinnamon, and soda together in small bowl. In large bowl cream butter and sugar. Separate egg. Add yolk to butter and sugar mix and set white aside for later. Add honey gradually to butter mix. Stirring until blended. Fold in flour mix slowly. Add milk as needed so that the batter is stirable but thick. Whisk the remaining egg white to a stiff froth and fold gently into the batter. Fill muffin tins ½ full. Sprinkle a little sugar on the tops. Natural brown sugar works wonderful. Bake at 425 for 15 -20 minutes.

Peace & Blessings
Janie

Thursday, July 16, 2009

Update to P3

Wanted to take a moment and let you all know about a great idea. As in the previous blog, I spoke of the perfect peach pie. Well it may have just been perfected a bit more. And the best thing is, that the credit goes all to my daughter. In her execution of her version of the pie, she realized she had no rolling pin. Therefore instead of a full size pie she opted for petite pies made in a cupcake pan, pressing the dough into place with her fingers. Needless to say they came out wonderful. She compared them to a fruit torte. I am so eager to attempt them myself as many times making a full size pie for just Vince and I is not a good thing. The pie sits on the cupboard just tempting me to eat more and more. In this case, an individual size pie would be perfect.

The only adjustment to the recipe is to bake them for apx 20 minutes or until they are golden brown... The perfect peach pie just got better.

Tuesday, July 14, 2009

P3

It seems that a mother always trys her best to teach her daughter the things that she feels will best help her in life later on. From cooking secrets, to cleaning tips, to just about anything. The tips could cover almost anything and sometimes nothing at all. Each mother has her own special secrets that her children feel she is quite good at. It is usually these areas that the children want to know all about. My area of expertise is cooking. Or so this seems to be it, if I go by the definition that I just stated. Cooking has always been something that I have loved to do. I remember as a child wanting nothing more for Christmas than an Easy Bake Oven. My mother was one of those moms that doesn't let you do anything in the kitchen because for it to be done right, she has to do it. I hope that I have not become like that. You know they say that you do become your mother.. but that is another story for another day.

My daughter wanted to know how to make a Peach Pie. The easiest of pies to make I think. Thus the recipe is on my blog. One way for a mother to bribe her daughter into reading her blog.

The pie crust of course is first. In the beginning, when I would make individual pies, I perfected a pie crust that had no recipe to it. It was the feel or consistency of the dough that let me know that it was right. Yet when you make a whole pie that changes. Because of kids and other time restraints, I yielded and used the pie dough you just roll out and lay in your pan. I was amazed at how people thought it was so good.. It was pretty, but it did not taste that good. At least I did not think so. Yet I used it, because it did the trick and it impressed. Tossed a little flour on my face and I was a great cook.

Yet as I have gotten older I take more pride in my creations and wanted to go back to the tried and true homemade pie crust. I attempted it a few times but just could not get it right. Then one day in the grocery store, I saw a box of Betty Crocker pie crust mix. Couldn't hurt, I thought. So I purchased one. It was the easiest crust ever and when baked it looked and tasted just like granny's. I had finally found the perfect pie crust.

Following is my recipe for P3 - or Perfect Peach Pie. I hope you try it out and enjoy every bite of it.

1 box of Betty Crocker Pie Crust
2-3 cups of sliced fresh peaches
lemon juice
3/4 c. sugar
1/2 c. flour
2 Tablespoons Butter
Dash of Cinnamon and/or Nutmeg

Prepare the pie crust according to box. Divide in half. Roll the first half with a rolling pin until it is approximately 10 inches in diameter. Fold Crust in half and lay in 8 inch pie pan. Gently press the crust to lie the pan evenly. Trim off any excess crust around edges. Place remaining dough to the side for later use.

Peel and slice peaches. Cling free are best as they will pull away from the seed best. Be careful to choose firm yet ripened peaches. Not too hard and not too mushy. Once peaches are sliced, sprinkle lightly with lemon juice and toss. This keeps the peaches from turning brown. Frozen peaches can also be used. Thaw part way before using. Do not thaw completely as this will cause the peaches to become mushy and may turn them dark. In a separate bowl mix the flour, sugar, and spices together. Gently pour over the peaches, folding the mixture so that the peaches are completely covered. This will make a gummy paste like mixture. Pour peaches into the pie pan lined with crust. Filling should make a slight mound. Filling will cook down slightly. Cut butter into small pieces and lay over the pie filling randomly.

Take the left over pie crust and roll into a 10 in circle. Fold crust and lay over the filled pie shell. Crimp the edges of the pie together so that it is sealed. Everyone has their own way of doing this . Any excess pie crust can be cut off and used later to make cinnamon crisps. Be sure and cut a center hole in the pie crust and several others. Brush lightly with milk and sprinkle sugar on top.

Place in a 350 degree oven for approximately 30-40 minutes or until the crust is lightly brown and the mixture can be seen bubbling in the center hole. Let cool and enjoy... Could not be easier.

Peace & Love
Janie
Content copyright 2009 - Janie Sheik - All rights reserved